HOME BREAD MAKING INSTRUCTIONS:
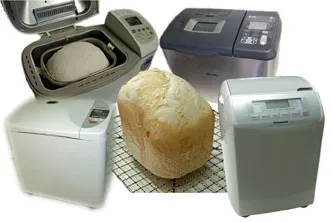 The bottom line..some machines produce great loaves...some do not, and most are great for mixing the dough but are then best baked in your conventional oven...either in the breadmaking pan or transfered to another tray or pan.
Important Note
Some bread-machines produce good loaves...some do not, and most are great for mixing the dough but are then best baked in your conventional oven...either in the bread-making pan or transferred to another tray or pan. Machines types and styles are numerous and settings vary on each model. Cottage Bread mix requires a mix, a long uninterrupted rise and a long hot bake. Most machines do not provide these options. A few do. Please read the information on bread-machines at the Home Baking section before you purchase a machine for making gluten-free breads.
Most machines come with a gluten-free setting which does not particularly suit the New Freedom Bakery Cottage Bread mix as this mix is a dough and not a batter. A batter mix only requires a mix, a relatively short rise and short bake. This cycle is not long enough to bake breads using the New Freedom Bakery Cottage Bread mix.
As a summary, if you must use a machine, the Panasonic SD 257 and SD 2501 can give a reasonably good loaf.
Use the "RYE" setting and this also works OK on the delayed or overnight timer but better loaves are made if you pull the edges in during the early part of the mixing cycle. If you use the new forked paddle that comes with the machine, it comes out of bread easily after baking.
- 460ml warm water
- 5g (1&1/4teasp.) good quality dry active yeast
- 5ml.oil
- 5ml white vinegar
- 400gm of Cottage Bread and Bun Mix
These are general guidelines only...with machines we've tried. Many new machines are entering the market and we will endeavour to update this section as we complete testing.
(i.e. the ideal is ....just load ingredients, press program button, press start, come back when loaf complete)
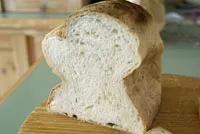
(i.e. no large holes, soft, light, even texture and good crust & colour,)
(i.e. the lower the purchase price... the higher the score)
(i.e. the quality of the loaf on the delayed or overnight setting)
likes - quietness; mixes well; good tin shape; reasonably good loaf on the "RYE" setting and this also works OK on the delayed or overnight timer; new forked paddle comes out of bread easily,
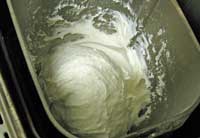
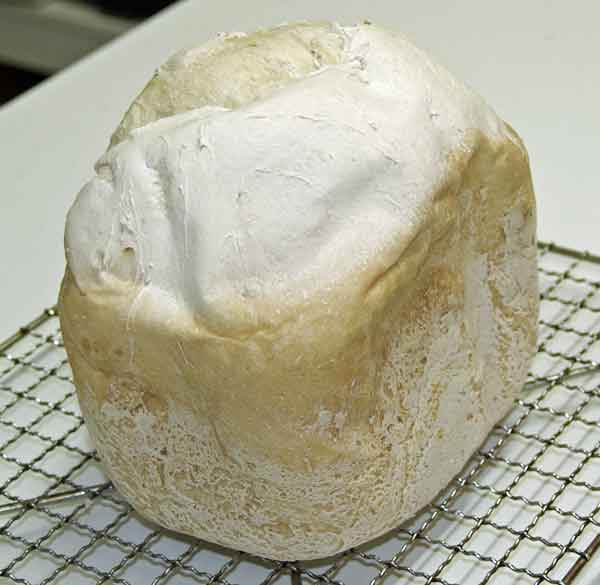 SD-257-Rye-delayed with mug
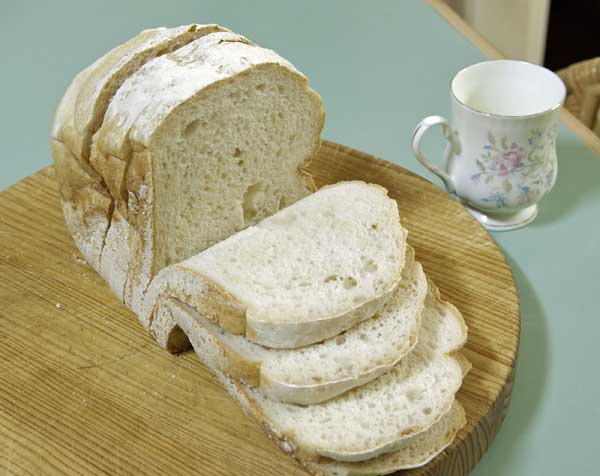 done with "RYE" setting overnight
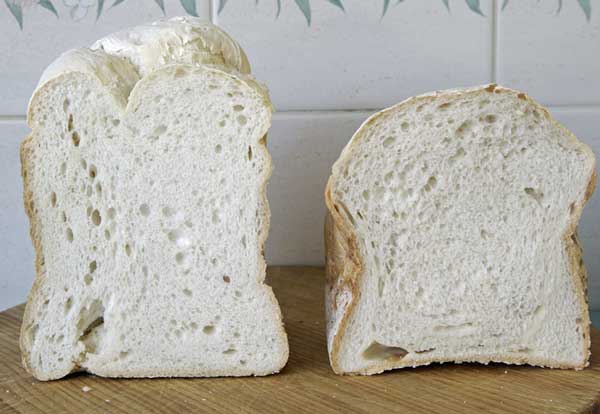
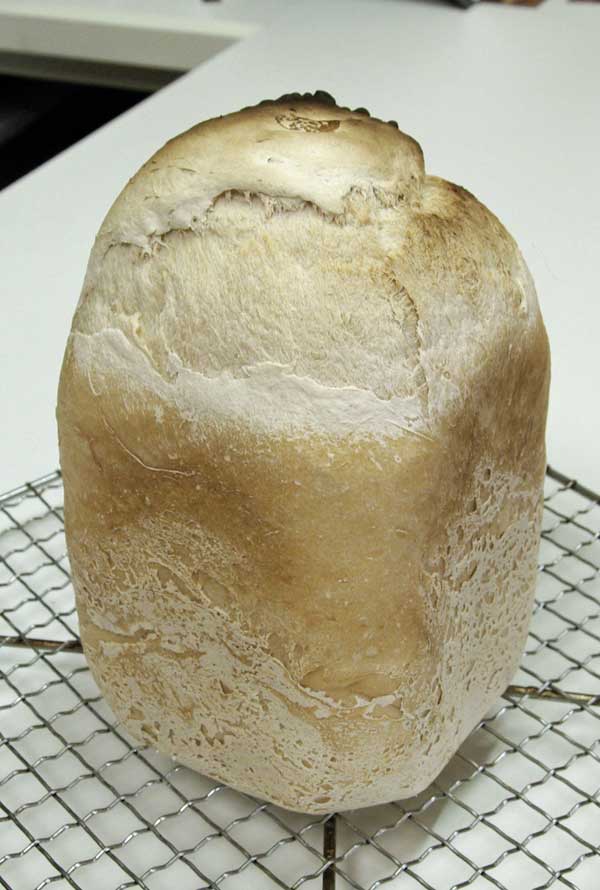
Loaf on left ... extra height results from dissolving yeast in warm water first then using spatula during mixing cycle.
Loaf on right ... was done on delayed timer setting with dry yeast sitting on dry mix.
then turn the machine off ...
allow the dough to rise in the pan in the machine and when risen, bake it in its pan in your normal oven.
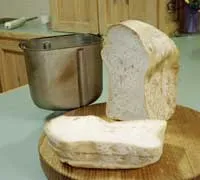
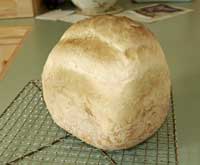
Loaf resulting from machine mixing on the dough setting... rising in the machine... but baking done in normal oven for 50 minutes @ 215deg.C.
likes - quietness, mixes well , good tin shape
likes - quietness, mixes well , good tin shape
dislikes - NO GLUTEN FREE setting; can't extend baking times; even on its best setting (WHOLE WHEAT RAPID) the loaf remains underbaked and leaves a hole around the paddle.
likes - manual settings; you can extend the baking cycle (and any other setting) to any length by using the MANUAL settings; can alter baking temperature also;
dislikes - the pan is too wide and long so the paddle has trouble mixing the flour in from the corners... so you have to stand around to help it mix with your spatula; the loaf shape is too large for slices for many toasters or typical lunch-boxes; the fold-down paddle does not always lift up to mix nor fold down out of the way after mixing; the vertical paddle does not collect all the ingredients well; the paddles can remove large chunks of baked bread when tipping out the finished loaf;
2nd Mix = 10 minutes
1st rise = 60 minutes
Bake = 70 minutes @ 150deg.
Set all other parts of the cycle to "0" minutes.
likes - manual settings; you can extend the baking cycle (and any other setting) to any length by using the MANUAL settings
dislikes - the pan is too wide and long so the paddle has trouble mixing the flour in from the corners... so you have to stand around to help in mix with your spatula; the loaf shape is too large for slices for many toasters or typical lunch-boxes; the paddle can remove large chunks of baked bread when tipping out the finished loaf; can't alter baking temperature so you have to bake a lot longer; loaves tend to collapse on sides when cooling due to lower baking temp.
Recommended Setting = manually set your cycle to the following times:
2nd Mix = 10 minutes
1st rise = 60 minutes
Bake = 80 minutes
Set all other parts of the cycle to "0" minutes.
Very large- wide pans with too low baking temperatures result in the centre of the loaf not fully baking which causes excessive side collapse when cooling...and a doughy centre. If you extend the baking time for too long, your baked crust becomes excessively thick.
Other Bread Machine Models
If your machine does not have these settings, then:
You can still use the machine to mix the dough... then turn the machine off... allow the dough to rise in the pan in the machine and when risen (usually about 60 minutes if kept warm), bake it in its pan in your normal oven for 50 minutes at 215deg.C .
We will include more models in our testing when we have access to them.
- the failure of bread machines to be able to make other shapes like rolls, free-form loaves, buns, baguettes, pizza bases etc .
- loaves will have a hole in the centre/base of them caused by the mixing blade (the hole increases in size as the non-stick blade surface wears - thus causing more bread to stick to the blade on removal)
- machines generally make large odd shaped loaves that are difficult to slice, store, make sandwiches from, and fit in a toaster
- most machines have difficulty browning the top of the loaf due to insufficient heat near the top glass .
- many machines have very long settings required to complete a cycle (i.e. well in excess of the 1.5hrs it takes to make by hand and baked in a normal oven)
- an overproofed loaf in a machine can result in a sticky mess to clean up
- many people have difficulty working out the machine operations and which settings suit which bread mixes
- most gluten-free mixes require a tin side scrape-down during the mixing cycle to get the best loaf
- the initial cost of purchase and replacement every few years... as well as replacement blades and bread pans more often
- some machines have very large, wide pans which make it particularly difficult for the ingredients to be mixed in from the corners. This results in unmixed dry bits in and outside the loaf and doughy streaks through the bread or uneven texture throughout
- finding a machine with the right settings to produce a good loaf can be difficult as models come and go regularly and settings change
- many machines do not have hot enough or long enough baking cycles to produce a good bread from our mix and need finishing off in a conventional oven
Ingredient Quantities for Machines
3g (3/4teasp.) good quality dry active yeast
3ml.oil
3ml white vinegar
200gm of Cottage Mix
4g (1teasp.) good quality dry active yeast
4ml.oil
4ml white vinegar
330gm of Cottage Mix
5g (1&1/4teasp.) good quality dry active yeast
5ml.oil
5ml white vinegar
400gm of Cottage Mix
6g (1 &1/2teasp.) good quality dry active yeast
6ml.oil
6ml white vinegar
450gm of Cottage Mix
Method for Full Mix & Bake Cycle in Selected Bread Machines
- Take your bread pan out of the machine and measure out the correct amount of warm water. Sprinkle the yeast over the surface of the water and gently swill the liquid around for about 1/2 minute to dissolve the yeast.
- Add the oil and white vinegar.
- Measure out the correct amount of mix and place it into the pan.
- Select the recommended setting for your machine as discussed above and press start.
During the mixing cycle, at some pointwe recommend lifting the lid and, using your rubber spatula, scrape down the sides of the pan to help all the dry ingredients combine well. Larger pans need more assisting.
- Allow the program to complete and remove the baked bread soon after the cycle is complete.
- Allow to cool on rack.
Method for "DOUGH" Setting followed by a Normal-Oven Bake
- Take your bread pan out of the machine and measure out the correct amount of warm water. Sprinkle the yeast over the surface of the water and gently swill the liquid around for about 1/2 minute to dissolve the yeast.
- Add the oil and white vinegar.
- Measure out the correct amount of mix and place it into the pan.
- Select the "Dough" setting on your machine and press start.
During the mixing cycle, at some point we recommend lifting the lid and, using your rubber spatula, scrape down the sides of the pan to help all the dry ingredients combine well. Larger pans need more assisting. - When the dough setting has completed just the mixing part of its cycle, turn the machine off and remove the pan.
You may leave the dough to rise in the turned-off machine if it keeps it warm... or... place the pan & dough in a warm spot to rise and cover with a damp cloth till it more than doubles its size. Then bake in your pre-heated conventional oven for 50 minutes @ 215deg.C. - If you wish to remove the dough to make other shaped breads, use your soft spatula to tip the dough out onto a lightly floured board and shape or mould the dough to whatever you wish.
- Cover the dough with a damp cloth and allow to rise to nearly triple in size in a warm spot.
- Bake in your normal pre-heated oven at the suggested temperatures and at suggested times chosen from the bread types on other pages on this web site.
- Allow to cool on rack.
If you remove the paddle from the pan after the mixing cycle is complete and leave the mix to rise in the pan... then bake in your conventional oven, your bread will not have the typical paddle hole in the base and your loaf should come out easily when baked.